Building a Weather Station With Arduino
Introduction
Introducing the Arduino Weather Center! With this small and compact weather station you can see the current temperature and if it is currently precipitating. The station has the following three components to make it work: a rain detection sensor, a temperature & humidity sensor, and an LED screen.
The LED screen automatically updates every 200ms with new temperature and humidity data. The screen also updates every 50ms with new information about rain detection. If rain is detected the screen updates with the words "Rain!". When rain in no longer detected the screen removes the words "Rain!".
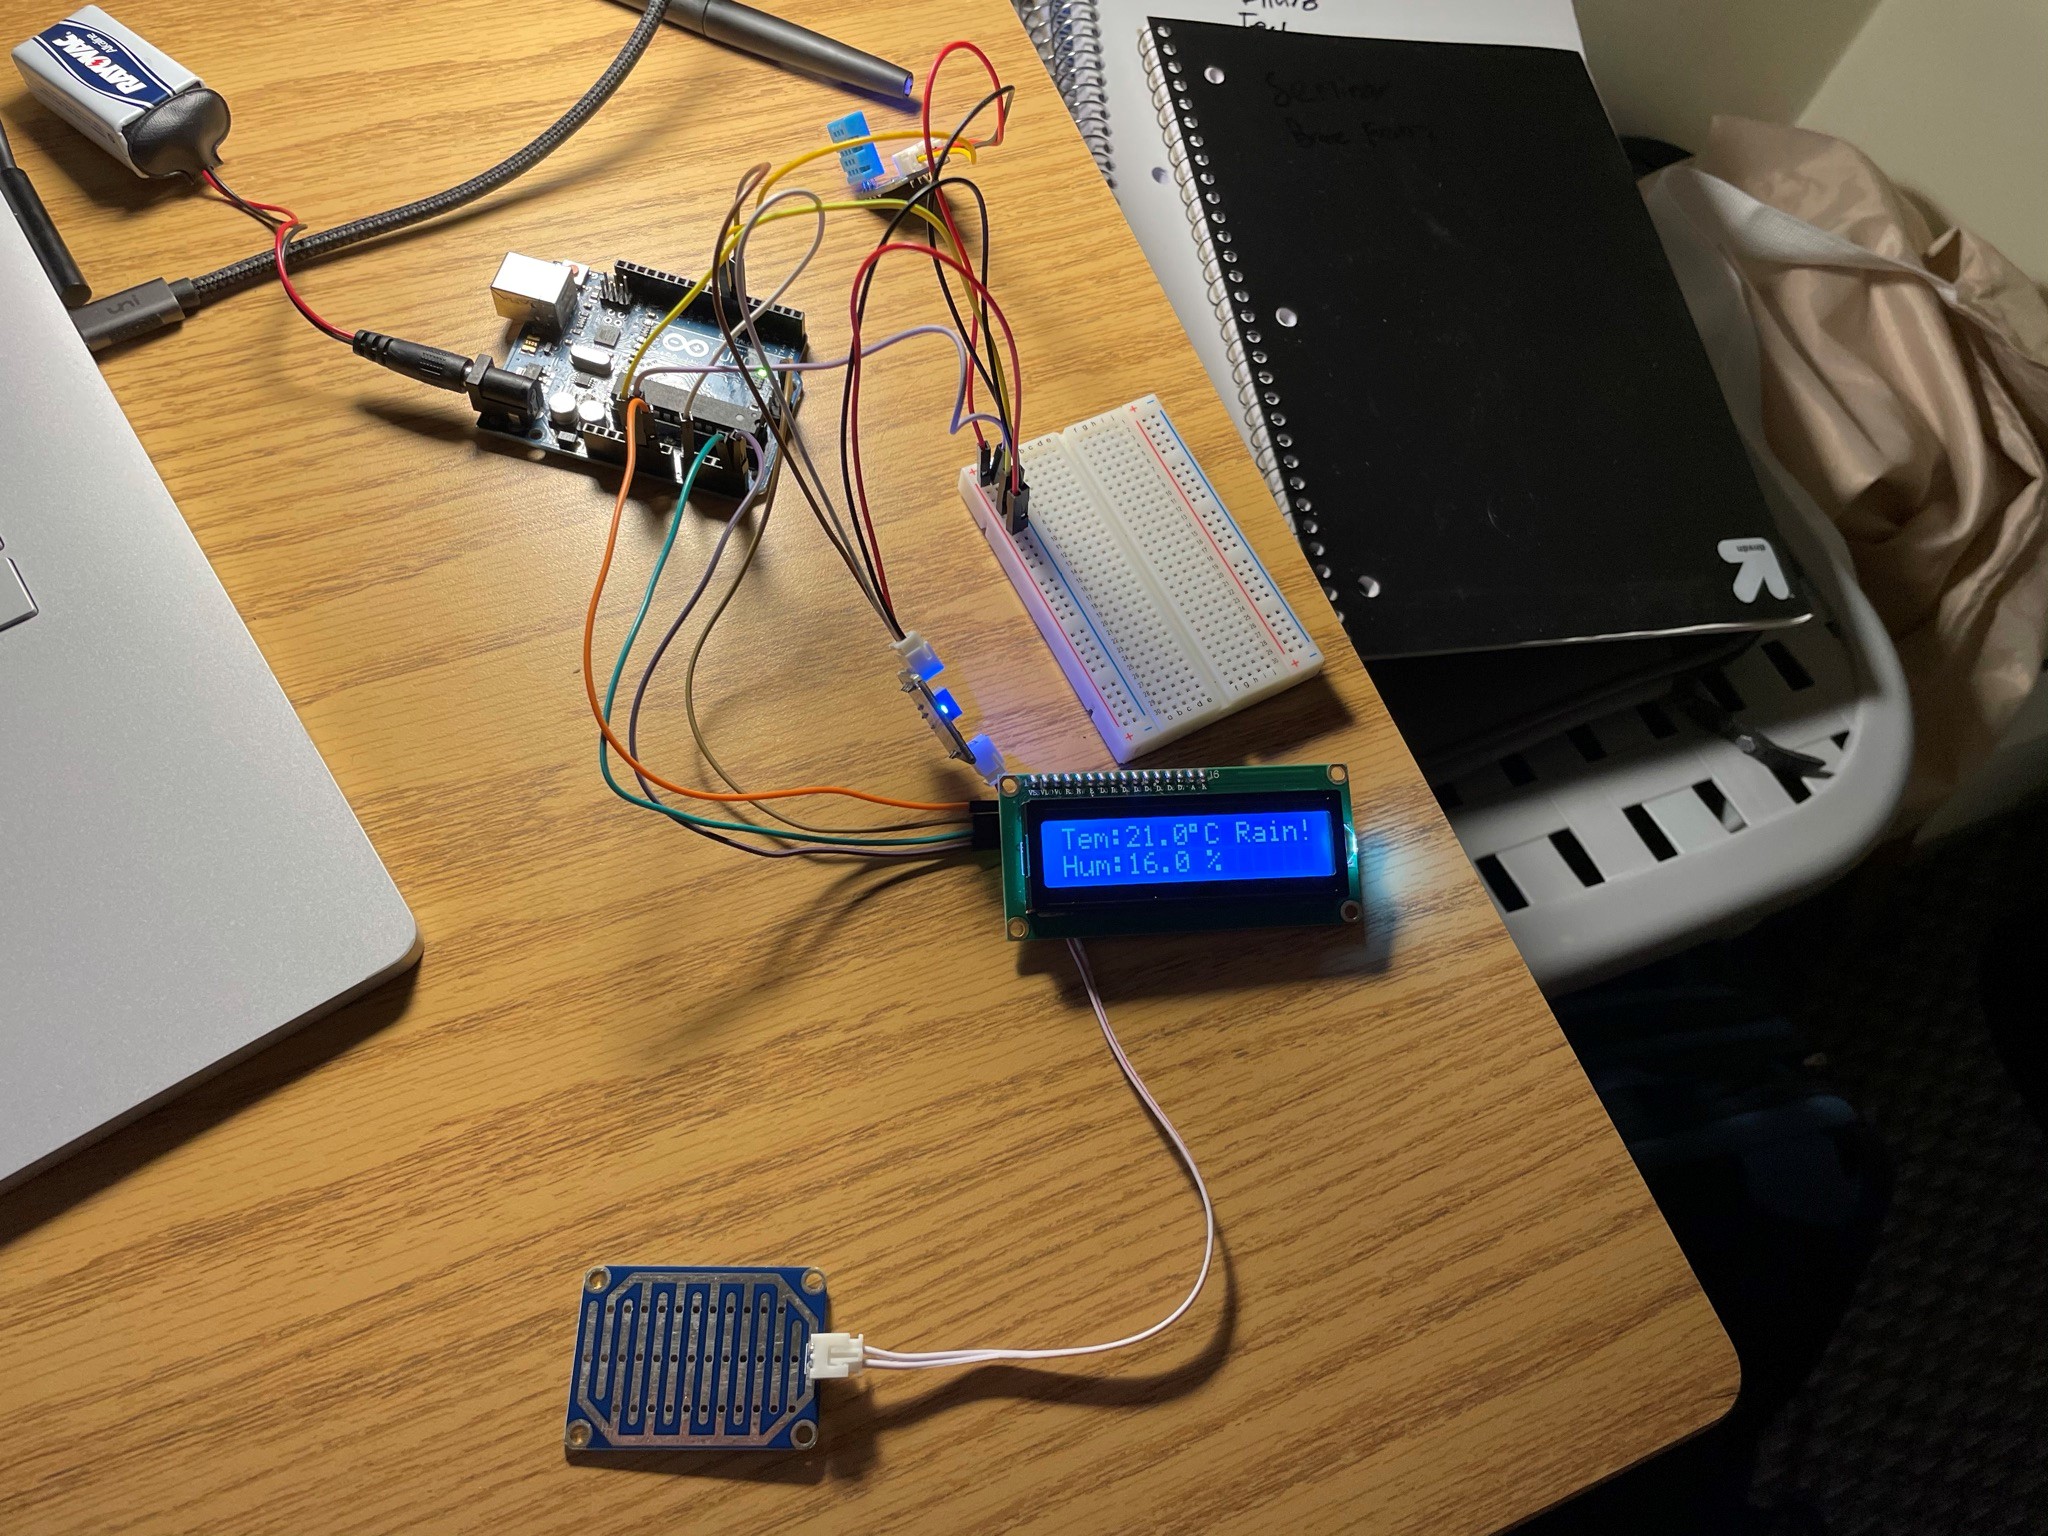
To accommodate extra power and ground locations a breadboard was used. The sensors are wired and connected to Arduino UNO board. I used the starter code from SunFounder to display temp and humidity values but added the rain detection element on my own. I also ran a port checker to find the port of the device to properly display info on the LED screen. The port of this device is 0x27.
To make the rain detection work an IF statement was used. Simply put if rain was detected print "Rain!". ELSE print " ". The else statement must be blank to accommodate for the removal of "Rain!".
A Real-World Application
When building this device I imagined how I could scale it up to apply it to real-world application. The idea I came up with was a hyperlocal weather app. As of now we rely on radar and expensive weather stations, what if we could deploy a network of these to areas where weather information is less accurate? The information that is then compiled from the sensors would be stored in a server and then data would be sent over the air (OTA). With my implementation in conjunction with the OTA element we would have one of most accurate weather apps in the world. The only thing we would need is more sensors!
To take this a step further, if we combined the data being collected from the sensors and the data coming from conventional weather stations/radar we could use artificial intelligence (AI) and machine learning (ML) to predict weather events and use the weather station that I built to send more accurate information to users and to confirm that it is indeed raining.
Wrapping Up
The primary reason that I built this weather station was to aid in my learning in the internet-of-things (IOT) space. IOT devices are starting to be the backbone of our daily lives. It would also be super cool to deploy a network of these and analyze the data and compare it to a weather app or historical weather data.
While this was my first time coding in C++ and using Arduino boards it was a super interesting experience to actually pull things from the real-world and have the device react to those changes. Normally all the programming I do is "virtual", an example being web design. The real struggle of this project was wiring the board, this is where I spent most of time on Google and on Youtube. Overall, I am super happy the way that this turned out!
Code
/*****************************************************
   name:weather_station
   function:you can see the current value of humidity, temperature and if it is currently raining.
 ******************************************************/

//include the libraries
#include <dht.h>
#include <LiquidCrystal_I2C.h>
#include <Wire.h>
LiquidCrystal_I2C lcd(0x27, 16, 2); // set the LCD address to 0x27 for a 16 chars and 2 line display

dht DHT;//create a variable type of dht

const int DHT11_PIN = 7; //Humiture sensor attach to pin7
const int analogPin = A0; //the AO of the module attach to A0
const int digitalPin = 7; //D0 attach to pin7
const int ledPin = 13; //pin 13 built-in led
int Astate = 0; //store the value of A0
boolean Dstate = 0; //store the value of D0

void setup()
{
  Serial.begin(9600);//initialize the serial
  lcd.init();  //initialize the lcd
  lcd.backlight();  //open the backlight
  pinMode(ledPin, OUTPUT); //set the ledPin as OUTPUT
  pinMode(digitalPin, INPUT); //set digitalPin as INPUT
}

void loop()
{
  // READ DATA
  //Serial.println("DHT11:");

  int chk = DHT.read11(DHT11_PIN);//read the value returned from sensor
  switch (chk)
  {
    case DHTLIB_OK:
      //Serial.println("OK!");
      break;
    case DHTLIB_ERROR_CHECKSUM:
      //Serial.print("Checksum error,\t");
      break;
    case DHTLIB_ERROR_TIMEOUT:
      //Serial.print("Time out error,\t");
      break;
    default:
      //Serial.print("Unknown error,\t");
      break;
  }
  // DISPLAY DATA
  lcd.setCursor(0, 0);
  lcd.print("Tem:");
  //Serial.print("Tem:");
  lcd.print(DHT.temperature, 1); //print the temperature on lcd
  // Serial.print(DHT.temperature,1);
  lcd.print(char(223));//print the unit" ℃ "
  lcd.print("C");
  // Serial.println(" C");
  lcd.setCursor(0, 1);
  lcd.print("Hum:");
  //Serial.print("Hum:");
  lcd.print(DHT.humidity, 1); //print the humidity on lcd
  //Serial.print(DHT.humidity,1);
  lcd.print(" %");
  //Serial.println(" %");
  Astate = analogRead(analogPin); //read the value of A0
  Serial.print("A0: ");
  Serial.println(Astate);  //print the value in the serial monitor
  Dstate = digitalRead(digitalPin); //read the value of D0
  Serial.print("D0: ");
  Serial.println(Dstate);
  delay(200); //wait a while
  if (Dstate == HIGH)
  {
    digitalWrite(ledPin, LOW);
    lcd.setCursor(11, 0);
    lcd.print("     ");

  }
  else
  {
    digitalWrite(ledPin, HIGH); //turn on the led

  }
  if (Astate < 500)
  {
  lcd.setCursor(11, 0);
  lcd.print("Rain!");
  }
  delay(50);
}